Continuing my crusade to build a website from start to finish! I am going to create the third page of my website and call it
pricing.html for my
texartisancakes.com website. Also, I am going to create customized accordion information tabs to match my website! (See earlier posts for lessons 1-15)
Accordion tabs are a good way to compress a lot of information in your website. After learning how to edit the slide show widget, (see lessons 11-15) this tutorial was a breeze! I really think I am getting the hang of this!
Overview: I am going create the third page of my website called Pricing and customize an Accordion Spry Widget to match my website!
(Double-click images to make them bigger.)
Lesson 16
How to create your third page and acquire and save an accordion tab widget to my widgets:
- Open the index.html that you have already created.
- Save as - pricing.html. (see figure 16.0)
- From the menu bar, click on the extended dreamweaver icon (the little icon that looks like the cog of a wheel.) Then click on Widget Browser. (see figure 16.1)
- In the Widget Browser, click Adobe Exchange, then scroll down and double-click on jQuery UI Accordion for Widget Browser. (see figure 16.2)
- Here you can preview the widget. In the bottom right corner click, add to my widgets. Then click on go to my widgets. (see figure 16.3 and 16.4)
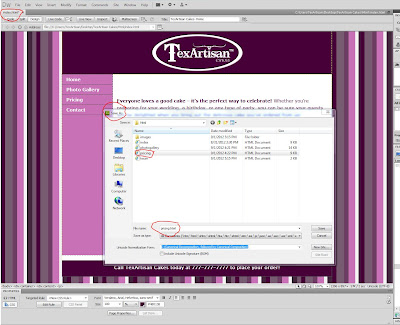 |
| figure 16.0 |
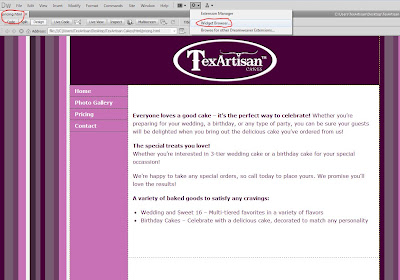 |
| figure 16.1 |
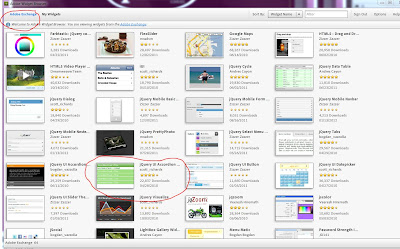 |
| figure 16.2 |
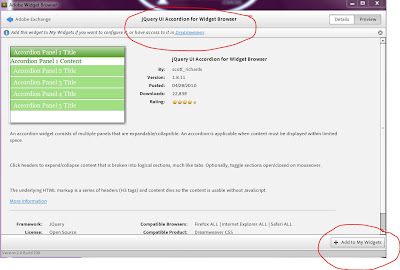 |
| figure 16.3 |
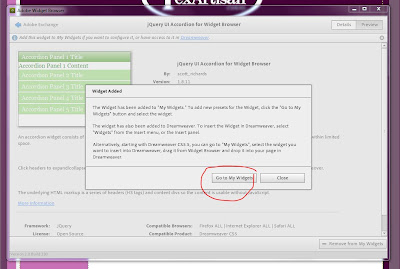 |
| figure 16.4 |
Lesson 17
How to customize the accordion widget to match your site:
- Within the my widgets window, click on jQuery UI Accordion for Widget Browser. (see figure 17.0)
- Pick from the list of styles the will best fit the theme of your website. I selected cloudy day. Select configure. (see figure 17.1)
- Give your widget a name and save. Double-click on your newly created widget to start editing it . (see figure 17.2)
- Click on the general, header, and contents toolbars and change the background colors and fonts to match your website. (see figure 17.3)
- Click save preset. (see figure 17.4)
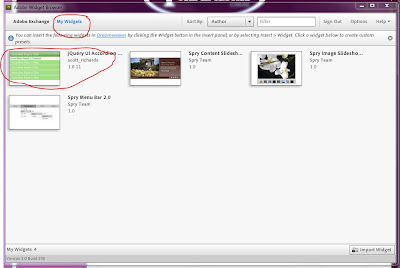 |
| figure 17.0 |
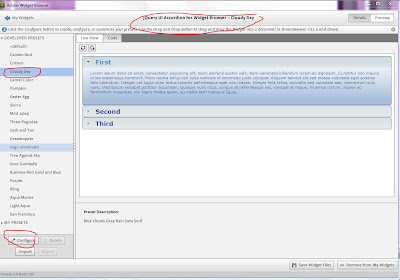 |
| figure 17.1 |
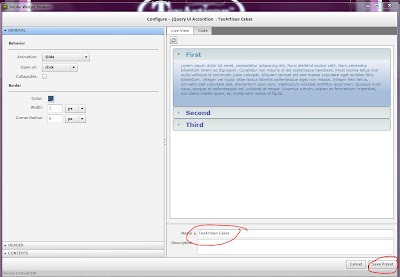 |
| figure 17.2 |
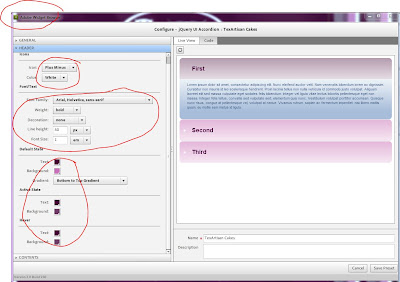 |
| figure 17.3 |
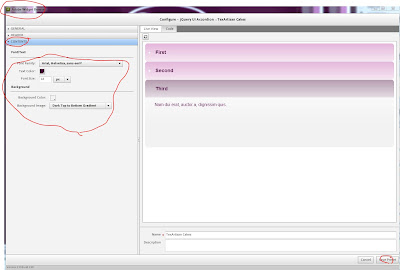 |
| figure 17.4 |


No comments:
Post a Comment